3. Create your first integration
Requirements
A CRM admin with admin privileges in Mobilo must complete these steps to grant the required access for the integration to function correctly.
Configuration
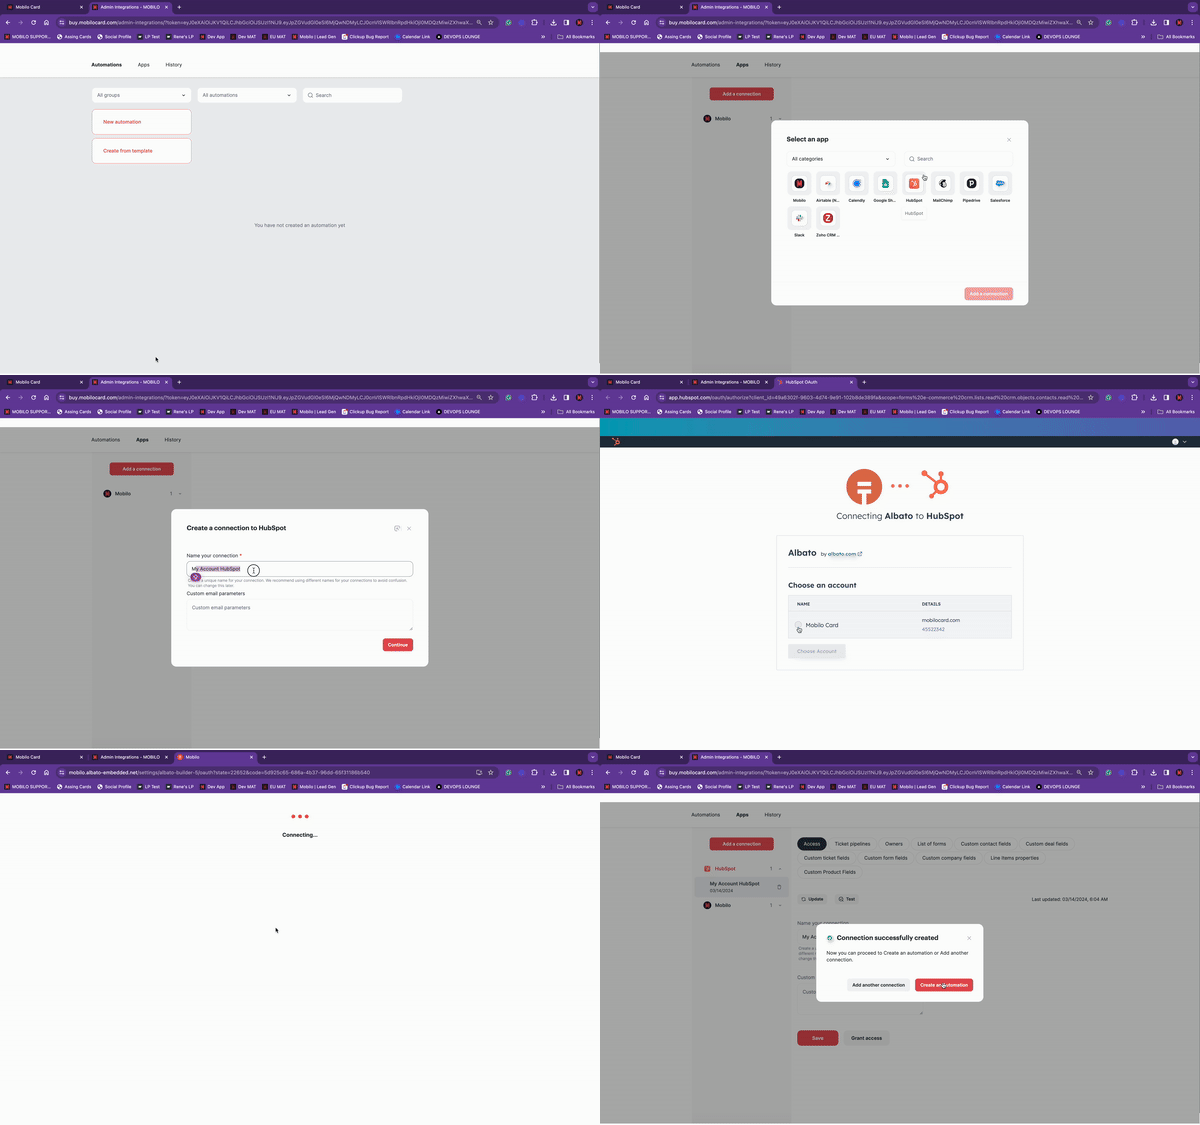
To configure your first integration, log in to our web app at app.mobilocard.com, go to the Integrations Menu, and click the ‘Open’ button under Native Integrations.

*Make sure to unblock pop-ups for this page the first time you access our integration builder.
Click the App tab and then the ‘Add connection’ button on the new window. A menu will pop up where you can select the app you want to integrate with. For this example, we will use HubSpot.
On the next menu, rename the connection and grant access by accepting the integration permissions with your CRM.

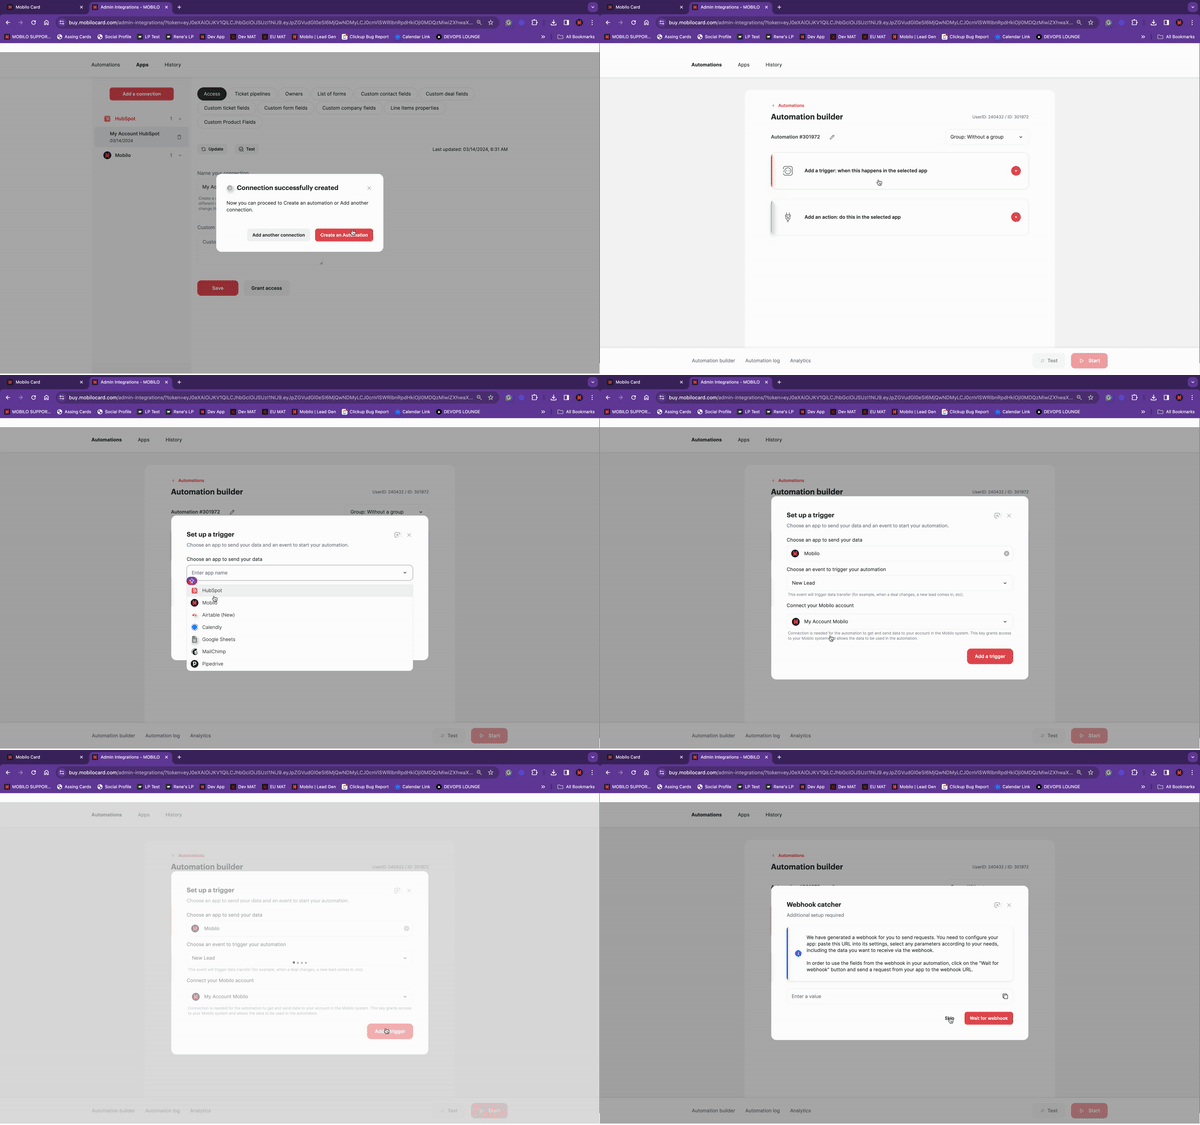
Next, click ‘Create Automation’, and start by setting up the ‘trigger’, this is what kicks off the integration. Since the leads are coming from Mobilo, we will search for the Mobilo App. Once you select the app, pick the ‘Trigger Event’. This tells the integration what to look out for; in this case, a ‘New Lead’.

Now that our trigger is set up, let's proceed with configuring the action. In this example, we want to create a new contact on HubSpot.

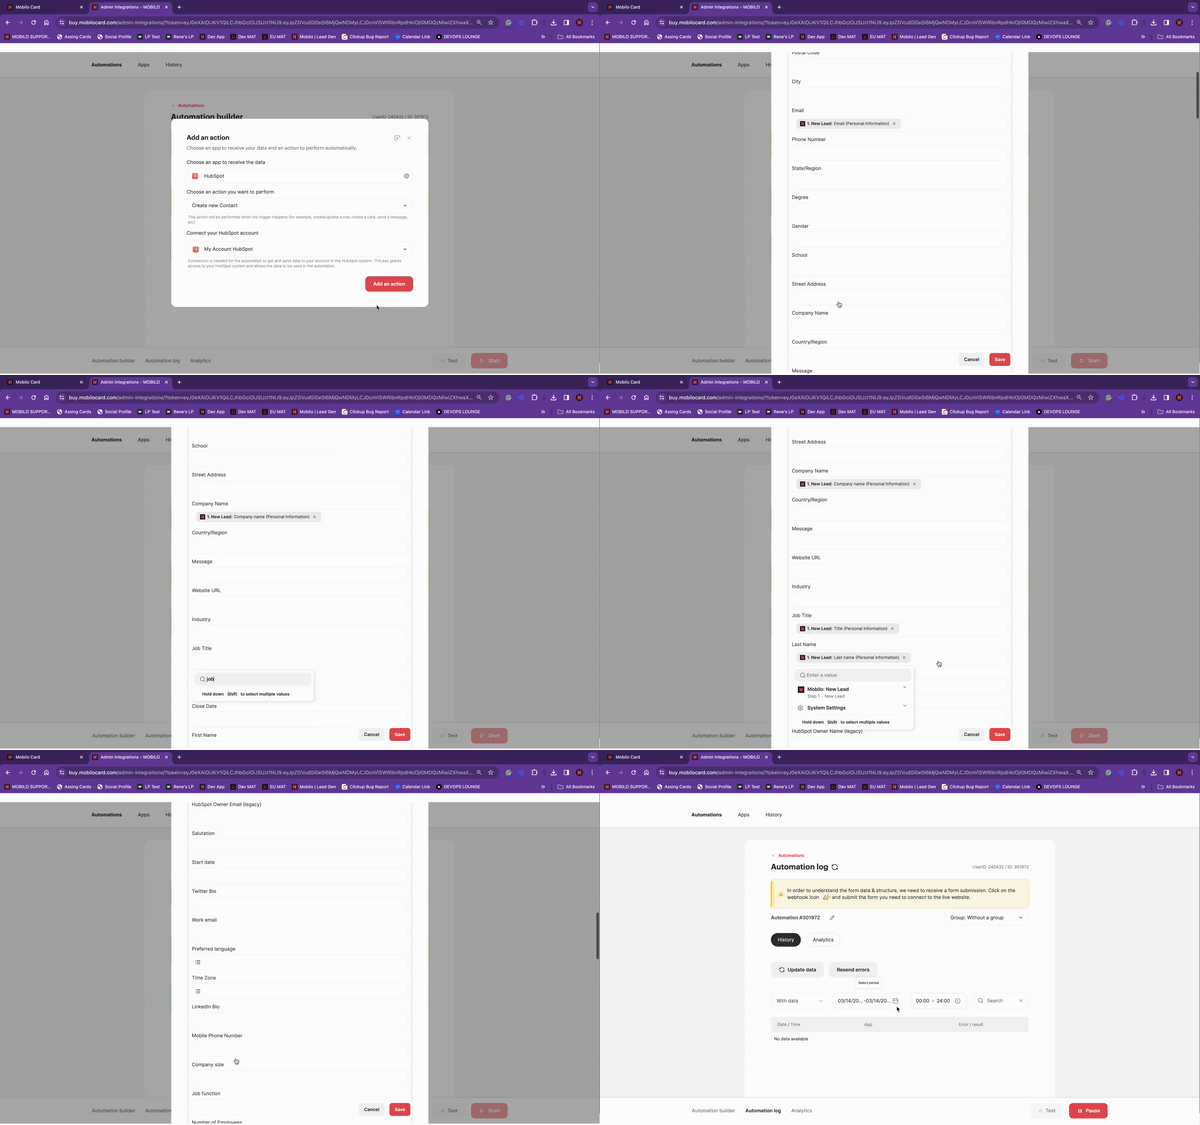
With the trigger and action setup, it’s time to map the data we want to transfer from Mobilo’s lead generation feature to HubSpot.
Make sure to map the fields you deem relevant by clicking on the corresponding fields, and selecting the data you want to transfer from the ‘Mobilo: New Lead’ drop-down menu.
In this example, we mapped the Email (Personal Details), Company Name (Personal Details), Title (Personal Details), and First and Last Name (Personal Details) to ensure that the lead’s information gets transferred to HubSpot.

*Please remember that the cardholder details are the ‘Acquired by’ fields.
Once you finish mapping, click the save button, hit the Start button to activate the integration, and go to the automation log.
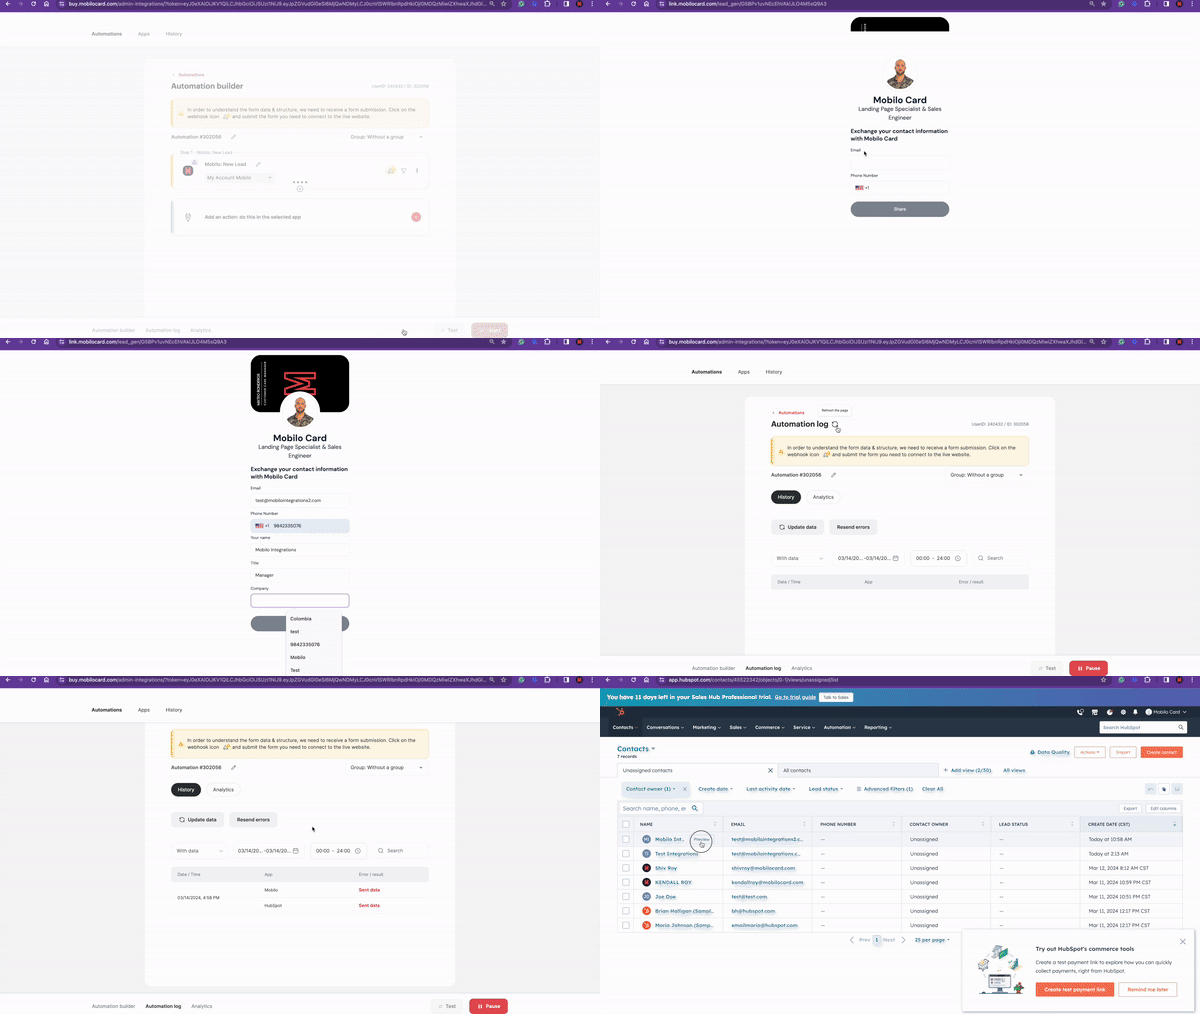
To test the integration, scan one of your cards using ‘Lead Generation Mode’, fill out the form, and submit it. You should see a new log on the ‘Automation Log’, and a new contact should be created on your HubSpot.

.svg)

